Model 400 3 Point Post Hole Digger for Compact/Sub-Compact/Cat 0 Tractors

The Model 400 3 point post hole digger is a farming equipment used for digging holes for fence posts, signposts, or any other job that requires digging deep holes in the ground. It is specifically designed to be attached to the back of a tractor or a tractor-like vehicle, which provides the necessary power to operate it. The Model 400 3 point post hole digger consists of a heavy-duty steel frame with a gearbox that connects the digger’s auger to the tractor’s power take-off. It has a 3-point hitch that attaches to the tractor’s hydraulic system to raise and lower the digger to the desired position.
Model 400 3 Point Post Hole Digger for Compact/Sub-Compact/Cat 0 Tractors
The Model 400 3 point post hole digger is a farming equipment used for digging holes for fence posts, signposts, or any other job that requires digging deep holes in the ground. It is specifically designed to be attached to the back of a tractor or a tractor-like vehicle, which provides the necessary power to operate it. The Model 400 3 point post hole digger consists of a heavy-duty steel frame with a gearbox that connects the digger's auger to the tractor’s power take-off. It has a 3-point hitch that attaches to the tractor's hydraulic system to raise and lower the digger to the desired position.
The auger is a spiral-shaped drill bit that rotates as the tractor’s engine turns the power take-off shaft. The rotation of the auger creates a hole in the ground as it goes deeper and deeper. The Model 400 3 point post hole digger comes in different configurations with various auger sizes, depending on the job's requirements.
Using the Model 400 3 point post hole digger requires a skilled operator who has experience in operating farming equipment. The operator must have knowledge of the terrain, soil type, and the necessary depth and width of the hole required for the job. Overall, the Model 400 3 point post hole digger is a reliable and effective tool that saves a lot of time and effort compared to manual digging.

▍Model 400 3 Point Post Hole Digger Parts

| Model 400 Post Hole Digger | |||
| ITEM # | P/N | Description | QTY |
| 1 | 27-024 | Series 1 Driveline | 1 |
| 2 | 95462A545 | 7/8”- 14 Hex Nut | 2 |
| 3 | 91102A037 | 7/8” Lock Washer | 2 |
| 4 | 43-027 | 7/8” Draw Pin | 2 |
| 5 | 24-0016 | Model 400 A-frame | 1 |
| 6 | 24-0029 | A-frame Pin | 1 |
| 7 | 43-047 | 7/16” LYNCH PIN | 1 |
| 8 | N/A | Compact Auger (Various Sizes) | 1 |
| 9 | 95462A033 | 1/2”-13 Hex Nut | 2 |
| 10 | 91102A770 | 1/2”-13 Lock Washer | 2 |
| 11 | 91247A724 | 1/2”-13 X 3” G5 Bolt | 2 |
| 12 | 98338A230 | 5/32” X 1-1/2” Cotter Pin | 2 |
| 13 | 24-0028 | Boom Pin | 1 |
| 14 | 24-0359 | 45 HP Gearbox with Guards | 1 |
| 15 | 95462A031 | 3/8” -16 Hex Nut | 1 |
| 16 | 91102A760 | 3/8” Lock Washer | 1 |
| 17 | 91247A636 | 3/8”-16 X 3” Bolt, G5 | 1 |
| 18 | 24-0015 | Model 400 Boom | 1 |
| 19 | 24-0014 | Manual Canister | 1 |
| 20 | 92865A581 | Bolt, 5/16”-18 X 3/4”, Shcs | 3 |
▍Model 400 3 Point Post Hole Digger for Sale
The Model 400 3-Point Tractor Post Hole Digger for Compact/Sub-Compact/Cat 0 Tractors
This is a new, high-quality post-hole digger that is OEM quality and has been in production for decades, serving farmers, landscaping professionals, and property owners proudly and reliably.
Compatible with 6", 9", 12"," Earth Auger Bits that bolt to a 2" gearbox shaft (36" recommended length - you can use 48" ones but they can drag when you're driving around)
Contains everything you need (besides the tractor!) to get digging!
1. Boom with high strength 2-7/8" tubing with 4 adjustment hole sets and manual canister
2. PTO driveline, robust 1 series with safety shields (1 3/8" x 6 Quick release x 1 1/4" Round w/ Shear Bolt)
3. Heavy duty right angle gearbox
4. High strength A-Frame - 21" lift arm spacing
5. Hardware kit with necessary pins and bolts
6. Can be purchased with or without augers via the dropdown menu. All augers are 36" in length.
7. Augers 6-12" diameter are Standard-Duty w/Replaceable Edges.
| Model | Model 400 Compact | Model 650 Standard Duty | Model 1000 Heavy Duty | Model 1500 Extra Heavy Duty |
| SKU | 24-0361 | 24-0362 | 24-0318 | 24-0337 |
| Category | 0 & 1 | 1 | 1 | 1 & 2 |
| Boom Length | 56" | 60" | 72" | 72" |
| Tubing Diameter | 2-7/8" | 2-7/8" | 2-7/8" | 3-1/4" |
| Draw Pin Width | 20" | 27" | 27" | 32-1/2" |
| Drive ine | Series 1 | Series 1 | Series 4 | Series 4 |
| Gearbox | 2.9:1 | 2.9:1 | 2.9:1 | 3.18:1 |
| Auger Diameters | 6", 9", 12" (3' lengths) | 6", 9", 12" | 6", 9", 12", 18", 24" | 6", 9", 12", 18", 24" |
| Weight | 150 bs | 160 bs | 200 bs | 235 bs |
| SKU | 24-0361 | 24-0362 | 24-0318 | 24-0337 |
| Features | 4 Positions | 3 Positions | 4 Positions | 4 Positions |
▍Model 400 3 Point Post Hole Digger Parts Dimensions
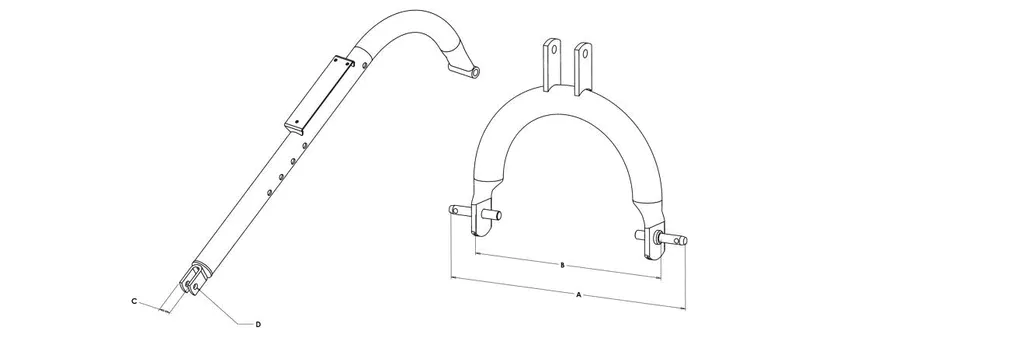
| Model # / CAT | A(in) Lower Hitch Point Spread -Max |
B(in) Lower Hitch Point Spread -Min |
C(in) Clevis/ Ball Joint Outside Width |
D(in) Upper Hitch Point Pin Dia |
| Model 400 / CAT 0, Sub Compact | 26-3/8 | 20-7/8 | 1.75 | 0.75 |
| Model 650 / CAT 1 | 33-1/2 | 28 | 1-5/8 | 1.0 |
| Model 1000 / CAT 1 | 32-3/8 | 26-7/8 | 1-5/16 | 0.75 |
| Model 1500 / CAT 1 & 2 | 38-3/8 | 32-7/8 | 1-5/16 | 0.75 |
▍PTO Shaft for Tractor 3 Point Post Hole Digger
• The PTO shafts are built strong to last
• Feature a quick disconnect 1-3/8" 6-spline that mounts to standard tractors
• Adjustable telescoping tube can handle high load demands given by the series designation
• Used on a variety of equipment from post hole diggers, spreaders, tillers, mowers, etc.
• Interchangeable with other manufacture

| Series | Shortest Length | Extended Length | Tractor End | Implement End | Common Uses | SKU |
| 1 | 27 | 34 | 1-3/8" x 6 QD | 1-3/8" x 6 QD | Fertilizer Spreader | 27-010 |
| 3 | 40 | 54 | 1-3/8" x 6 QD | 1-3/8" x 6 QD | Finishing Mower, Tiller | 27-011 |
| 4 | 30 | 40 | 1-3/8" x 6 QD | 1-3/8" Round | Finishing Mower, Tiller | 27-012 |
| 4 | 32 | 42 | 1-3/8" x 6 QD | 1-3/8" Round | Rotary Cutter | 27-013 |
| 4 | 36 | 43 | 1-3/8" x 6 QD | 1-3/8"x6 Clutch | Rotary Cutter, Tiller | 27-014 |
| 4 | 37 | 50 | 1-3/8" x 6 QD | 1-3/8" Round | Rotary Cutters, Pond | 27-015 |
| 4 | 42 | 58 | 1-3/8" x 6 QD | 1-3/8" Round | Post Hole Digger | 27-016 |
| 4 | 48 | 65 | 1-3/8" x 6 QD | 1-3/8" x 6 QD | Post Hole Digger | 27-017 |
| 4 | 53 | 74 | 1-3/8" x 6 QD | 1-1/4" Round | Post Hole Digger | 27-018 |
| 5 | 42 | 57 | 1-3/8" x 6 QD | 1-3/8" Round | Rotary Cutters | 27-019 |
| 12 | 48 | 64 | 1-3/8" x 6 QD | 1-1/4" Round | Heavy Duty Digger | 27-020 |
| 14 | 37 | 49 | 1-3/8" x 6 QD | 1-3/8" Round | Post Hole Digger | 27-021 |
| 14 | 56 | 77 | 1-3/8" x 6 QD | 1-3/8" Round | 5' & 6' Pull Cutters | 27-022 |
▍Model 400 3 Point Post Hole Digger Advantages
The Model 400 3 point post hole digger offers several advantages, including:
Easy to use design: This 3 point post hole digger is designed to be user-friendly, making it easy for even novice users to operate.
Efficient digging: The Model 400 3 point post hole digger is built with heavy-duty steel to ensure efficient digging with minimal effort.
Adjustable depth: Users can adjust the depth of the hole as needed, making it ideal for a wide range of applications.
Wide compatibility: The 3 point quick hitch design allows the post hole digger to be attached to most tractors, making it versatile and convenient for use on different job sites.
Durability: The Model 400 3 point post hole digger is made with high-quality materials to ensure durability and long-lasting use, even in tough conditions.
Overall, the Model 400 3 point post hole digger provides reliable and efficient digging capabilities, making it a valuable addition to any farming or construction equipment lineup.
 |
 |
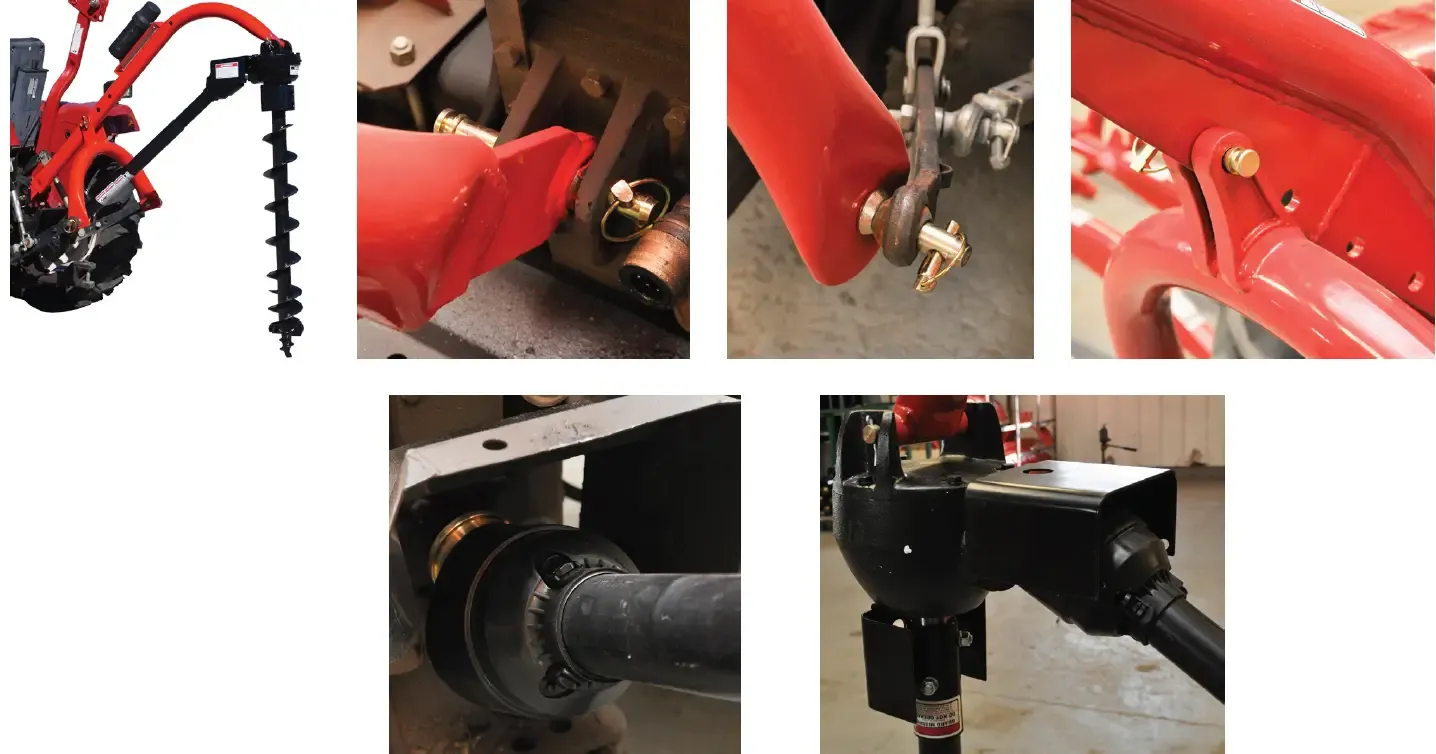
▍Model 400 3 Point Post Hole Digger Assembly Instructions
Step 1:
The 3 point post hole digger gearbox is shipped without lubricant. Fill the top hole with EP90 lubricant or equivalent. The 3 point post hole digger gearbox holds 25 fluid oz. (0.7 liters). Fill to the bottom of the plug on the side. Do not overfill as this can cause damage to the seals. Check the oil level every 50 hours of operation.
Step 2:
Remove the manual and hardware pack from the manual canister 2. Attach manual canister 2 on the boom 3 using hex bolt M8 X 16 X 1.25mm 1.

Step 3:
Attach the 7/8” lock washer 3, 7/8” hex nut 2, and draw pin 4 to the “A” frame 5. For the model 650 digger, Category 1 tractors (lift arm spacing of 26”), use the pins in the inward position. For Category 2 tractors (lift arm spacing of 32”), the pins should point outwards.

Step 4:
Connect the “A” frame assembly 2 to the tractor’s 3-point lift arms. Attach boom assembly 1 to the tractor. Attach the “A” frame 2 to the boom 1 using pin 3 and lynchpin 4 The size of your tractor and auger will determine which hole will work best for the angle adjustment. After complete assembly, the “A” frame to boom location might need to be changed, with the tractor lift arms raised the auger should be no more than 6″ off the ground.

Step 5:
Attach the 3 point post hole digger gearbox 1 to the boom using the boom pin 2 and secure it with cotter pins 3.

Step 6:
Attach the driveline 1 to the 3 point post hole digger gearbox input shaft using the hex bolt 3/8” x 3″ G5 2, 3/8” lock washer 3, and 3/8”-16 hex nut 4. Insert the ¼”x 3/8” set screw in the hole on the yoke that aligns with the 3/16” groove on the gearbox input shaft. Tighten loosely. Attach the tractor end of driveline 1 to the tractor PTO shaft. Retract the yellow zinc-plated outer collar and slip it on the splined PTO shaft of the tractor. Release the collar when it is securely in place on the shaft. The driveline has a 1-3/8×6 spline for the tractor end. PTO adaptors or extenders are not recommended.
Attention:
the hex bolt 3/8″-16 x 3″ G5 2 provides shear protection. Use a grade 2 or grade 5 bolt only to avoid damage to the gearbox or auger.
Important Note:
The universal joint should be greased with a quality-grade chassis lube approximately every 6 months. At the beginning of each season grease the sliding driveshaft members with moly grease. All diggers are equipped with quick-detach universal joints on the power-take-off end for a 1-3/8 in. splined shaft.

Step 7:
Attach the auger 1 to the output shaft on the bottom of the 3 point post hole digger gearbox using the hex bolts 1/2″-13×3″ 4, ½” lock washer 3, and ½” hex nut 2. Tighten the hardware.

NOTE:
- See the images below for reference in assembling the digger and mounting it to the tractor.
- If the 7/8 in. diameter draw pins in the “A” frame are too small for the holes in the lift arms a Cat 1 to Cat 2 draw pin can be substituted or bushings should be used to obtain the proper fit.
▍Model 400 3 Point Post Hole Digger Operating Instructions
Warning:
Read and thoroughly understand all instructions and safety information before assembling or operating this 3 point post hole digger. Failure to do so may cause serious injury or death.
- Step 1:
After attaching the post hole digger to the tractor, before engaging the power, slowly lower the auger to the ground at the desired angle for hole-digging. - Step 2:
Engage the power take-off and start digging at a slow speed lowering the auger slowly as the hole is dug. - Step 3:
Increase the speed as the auger goes deeper into the ground. The type of soil will determine the proper auger speed. Very hard or compacted soil may require operation at varying speeds to be the most efficient in digging.
Never allow the tractor’s engine to run while manually dislodging an obstacle.
If a rock or other obstacle is encountered that is too large for the auger to displace the post hole digger will begin to vibrate. Slowly withdraw the auger from the hole completely. Turn off the tractor’s power and remove the obstacle manually. Slowly lower the auger into the hole and engage the power to complete digging the hole. - Step 4:
After the desired hole depth has been reached, spin the auger at a high speed to clear the hole of the soil. Reduce the speed before withdrawing the auger from the hole. - Step 5:
Disengage the power take-off after withdrawing the auger from the hole and move to the next desired hole location.
▍How to Maintenance a 3 Point Post Hole Digger?
Maintaining a 3 point post hole digger is essential to ensure long-lasting performance and safety. Here are some steps to maintain your 3 point post hole digger:

Keep it clean: After each use, clean the post hole digger thoroughly to remove dirt, debris, and grime. Use a pressure washer or a garden hose to wash it properly.
Lubrication: Lubricate all moving parts with the proper lubricants recommended by the manufacturer. Check for worn or damaged parts and replace them as needed.
Check the bolts: Regularly check the bolts and nuts to see if they have come loose or not. Make sure to tighten them as needed to prevent the post hole digger from becoming unstable or losing parts.
Keep it stored properly: Store the post hole digger in a dry and covered area to protect it from moisture and rust.
Inspect before use: Before each use, inspect the post hole digger to ensure that it is functioning correctly and all parts are in good condition. If you notice any damage, don't use the post hole digger until the parts are replaced or repaired.
By performing regular maintenance on your 3 point post hole digger, you can ensure that it remains in good working condition for a long time to come.
Additional information
| Editor | Yjx |
|---|
Related products
-
AH140497 Idler Pulley For John Deere Combine
-
AH226058 Pulley For John Deere Combine Feed House Parts
-
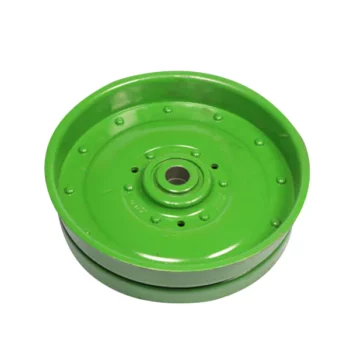
AH221938 Pulley For John Deere Combine & Forage Harvest
-
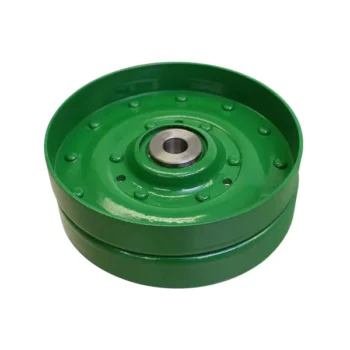
AH150900 Pulley for John Deere Combine Feed House Parts
-
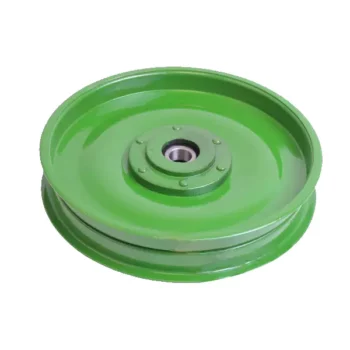
AN30569 Pulley for John Deere Combine Feed House Parts
-
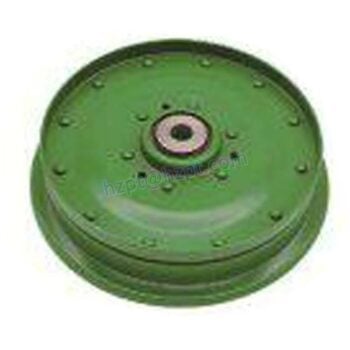
AH226058 Roller Pulley For Agricultural Combine

We promise will offer the best price by the high quality in china! We also accept special order about the products. If you are interested in our products. Please do not hesitate to let us know.We are pleased to give you the detailed information.We promise that our products would be safety and were in high quality and reasonable price. If you are interested in our products, please contact us asap.We are sincerely looking for your cooperation.
Most of our products are exported to Europe or Americas, both standard and nonstandard products available. We can produce as per your drawing or sample. Material can be standard or as per your special request. If you choose us, you choose reliable.
Industries We Service
